
Last updated: February 28, 2025
Available with any of the following subscriptions, except where noted:
|
|
HubSpot automatically provisions a standard SAN SSL certificate through Google Trust Services when you connect a domain to your account. Standard SSL provisioning usually takes a few minutes, but can take up to four hours.
If you've purchased the custom SSL add-on, you can upload custom SSL certificates to HubSpot. You can also configure security settings for each connected domain, such as TLS version and security headers.
Please note: if you encounter errors during the SSL provisioning process, learn more about troubleshooting SSL certificate errors.
- Google Trust Services is the certificate authority that provisions a certificate for your domain. If your domain has a Certification Authority Authorization (CAA) record, ensure pki.goog is listed so SSL can be provisioned or renewed.
- If you are using a Let's Encrypt SSL certificate, it's recommended to remove your CAA record, then add a CAA record to support Google Trust Services. This will ensure your website functions as expected on older Android devices.
Pre-provision your SSL certificate
If you're moving your existing site to HubSpot, you may want to pre-provision an SSL certificate so there's no SSL downtime. You can pre-provision an SSL certificate while connecting a domain to HubSpot.
To pre-provision an SSL certificate:
- On the DNS Setup page of the domain connection process, a banner will appear if your site has an existing SSL certificate. Click Click here to begin the provisioning process.

- Follow the instructions in the dialog box:
- Log in to your DNS provider account, such as GoDaddy or Namecheap.
- In your DNS provider, navigate to the DNS settings screen where you manage your DNS records.
- Create new DNS records according to the dialog box using the Host (name) and Value values provided in the dialog box.
Please note: if you're using Network Solutions, Namecheap, or GoDaddy, you do not need to copy the root domain. Your provider will add a root domain to the end of the DNS record automatically.
- Click Verify. It can take up to four hours for your changes to process. If you get an error when clicking Verify, wait a few minutes then click Verify to check again.
Once your certificate has been pre-provisioned, a confirmation banner will appear in the domain connection screen. You can then continue connecting your domain.
Set up a Domain Control Validation (DCV) record
If you see an error in your domain settings stating that "Reverse proxy domains need your action to avoid website disruption," it's recommended to add a Domain Control Validation (DCV) record to keep your SSL certificate up to date.

- In your HubSpot account, click the settings icon in the top navigation bar.
- In the left sidebar menu, navigate to Content > Domains & URLs.
- For each domain with an Action required label, click the Edit dropdown menu and select Show DNS records.

- In a separate window, log into your DNS provider and access your DNS records. For detailed instructions on editing your DNS records for the most common DNS providers, check out the DNS setup guide.
- In HubSpot, copy the values for the DCV record in the dialog box, then paste them into a new record in your DNS provider account. When you add a new DCV record to your DNS account, it can take up to 24 hours for the DNS changes to finish updating.
Domain security settings
You can customize the security settings for each subdomain connected to HubSpot. Security settings include your website protocol (HTTP vs. HTTPS), TLS version, and your website security headers.
To update a domain's security settings:
- In your HubSpot account, click the settings icon in the top navigation bar.
- In the left sidebar menu, navigate to Content > Domains & URLs.
- Next to the domain, click the Actions menu and select Update domain security settings.

HTTPS protocol
You can require all pages on your site to load securely over HTTPS. Once this setting is turned on, content loaded over HTTP, such as images and stylesheets, will not load on your site. Content loaded over HTTP on an HTTPS site is referred to as mixed content. Learn how to resolve mixed content errors on your page.
To turn on HTTPS protocol, select the Require HTTPS checkbox.
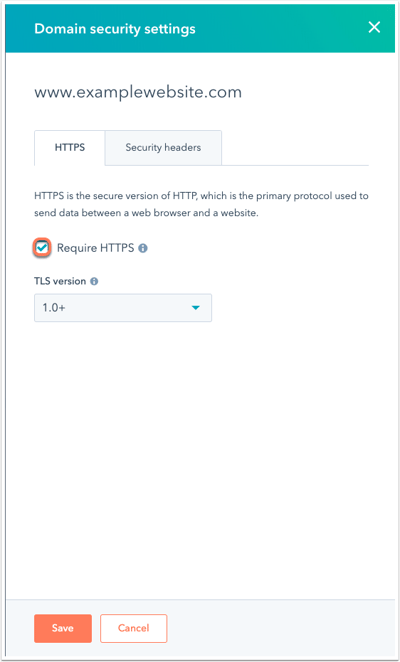
TLS version
By default, HubSpot servers will accept a connection using TLS 1.0 and above.
To change which TLS versions are supported, click the TLS version dropdown menu and select the lowest TLS version that you want to support. Connections attempting to use a TLS version lower than the minimum set will fail.

Security headers
You can configure your domain security and turn on security headers for each domain.
HTTP Strict Transport Security (HSTS)
You can add an extra layer of security to your website by enabling HTTP Strict Transport Security (HSTS). HSTS instructs browsers to convert all HTTP requests to HTTPS requests instead. Enabling HSTS adds the HSTS header to responses for requests made to the URLs on the subdomain.
- To turn on HSTS, click the Security headers tab, then select the HTTP Strict Transport Security (HSTS) checkbox.

- To set how long browsers should remember to convert HTTP to HTTPS requests, click the Duration (max-age) dropdown menu and select a duration.
- To include the preload directive in the domain's HSTS header, select the Enable preload checkbox. Learn more about HSTS preloading.
- To include the HSTS header in all subdomains under the selected subdomain, select the Include subdomains checkbox. For example, if HSTS is turned on for www.examplewebsite.com and the Include subdomains checkbox is selected, cool.www.examplewebsite.com will also have HSTS turned on.
Learn more about the HSTS header.
Additional domain security settings (Content Hub only)
If you have a Content Hub Starter, Professional, or Enterprise account, you can turn on the additional security settings below.
X-Frame-Options
Turn on the X-Frame-Options response header to indicate whether or not a browser can render a page in ,